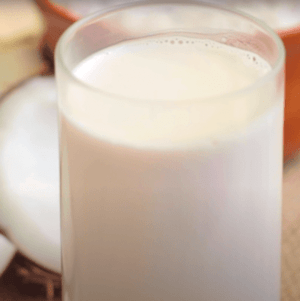
Fresh Homemade Coconut Milk - Richer & Healthier Than Canned
Making your own coconut milk at home is surprisingly easy and the results are far superior to anything from a can. Fresh coconut milk has a cleaner, sweeter flavor without preservatives or stabilizers. This recipe uses one fresh dried coconut to produce about 700ml of rich, creamy plant milk perfect for curries, smoothies, desserts, or morning coffee. The process involves cracking the coconut, blending the flesh with hot water, and straining through a cloth. The leftover coconut pulp (okara) can be dried and used as coconut flour or added to baked goods. Once you try homemade coconut milk, you'll never go back to canned!
Ingredients
- 1 dried coconut (2 and a half cups of shredded coconut or about 250g)
- 3 cups (of tea) of hot water (about 720 ml or more if you prefer thinner)
Steps
Step 1: Preheat the oven to 240 degrees celsius
Step 2: Squeeze all the water out of a dry coconut and roast it on a baking sheet for 15 minutes or until cracked
Step 3: Wait for it to get warm and, holding it with a cloth, hit it with a hammer to break the coconut well
Step 4: Separate the shell from the coconut pulp with the aid of a knife
Step 5: In a blender add the coconut pulp with the hot water and beat for 3 minutes
Step 6: Wait to get warm and strain with a clean cloth sieve
Tips for Perfect Homemade Coconut Milk
Roast the Coconut First Roasting the coconut before cracking makes it easier to open and intensifies the coconut flavor. Watch carefully - it should just crack, not burn.
Use Hot Water Hot water (not boiling) extracts more coconut cream and creates richer milk. Cold water results in thinner, less flavorful milk.
Save the Coconut Cream Refrigerate the milk for a few hours - the cream will rise to the top and solidify. Scoop and use as dairy-free whipped cream or in creamy curries.
Don't Waste the Pulp The strained coconut pulp can be dried at low temperature and ground into coconut flour, or added directly to smoothies, oatmeal, or baked goods.
Vegan Tips
1: Be careful when handling the hot parts of the recipe, use cloths or wait for it to cool down before taking it
2: You can take it pure, drink it with coffee, use it in vitamins
3: It is less concentrated and is more natural than the industrialized one
4: To strain the milk, you can use a coffee strainer
5: To make the milk whiter, you can remove the brown crust
6: Store the milk in the fridge in a tightly closed glass jar for up to 5 days
7: Over time, coconut milk can clot at the top, to use it again, just mix and heat
8: If you separate the coagulated part of the coconut, it can replace the cream in some recipes
Coconut Milk Variations
Adjust to your needs:
🥛 **Thin Coconut Milk:** Use 4 cups water with 1 coconut - perfect for drinking or lighter curries.
🍮 **Coconut Cream:** Use 2 cups water instead of 3 for extra-thick, cream-like consistency.
🥥 **Toasted Coconut Milk:** Roast shredded coconut before blending for deeper, nuttier flavor.
🌴 **Vanilla Coconut Milk:** Add 1 vanilla bean or 1 teaspoon vanilla extract while blending.
Frequently Asked Questions
How long does homemade coconut milk last?
Store in a sealed glass jar in the refrigerator for 4-5 days. The cream will separate - just shake or stir before using.
Can I freeze coconut milk?
Yes! Freeze in ice cube trays for easy portioning. Frozen coconut milk cubes are great for smoothies.
Can I use shredded coconut instead of fresh?
Yes! Use 2 1/2 cups unsweetened shredded coconut. Skip the roasting/cracking steps and simply blend with hot water.
Why isn't my milk as thick as canned?
Canned coconut milk often contains guar gum or other thickeners. Homemade milk is thinner but more natural. For thicker milk, use less water.
Nutrition Information (per 100ml)
Calories: 180 kcal | Protein: 2g | Carbs: 4g | Fat: 18g | Fiber: 1g | Rich in medium-chain triglycerides (MCTs) that support energy and metabolism.

