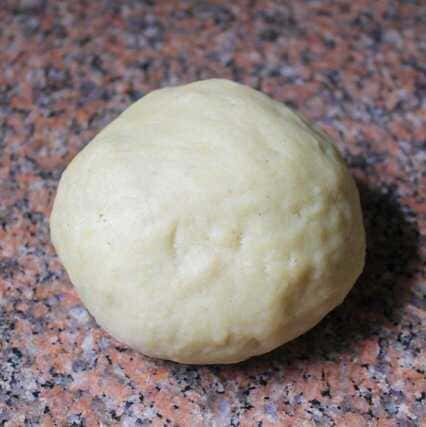
The Perfect Vegan Coxinha Dough
This classic coxinha dough is the foundation of Brazil's most beloved street food snack. Made with just 5 simple ingredients - water, flour, oil, salt, and spices - it creates a smooth, elastic dough that's easy to shape into the iconic drumstick form. The key technique is cooking the dough on the stovetop (similar to choux pastry) which creates a soft, pliable texture that becomes crispy when fried. This versatile dough is naturally vegan (no eggs, no dairy) and can be filled with jackfruit, mushrooms, vegetables, or vegan cheese. Master this dough and you'll be making authentic Brazilian coxinhas at home in no time.
Ingredients
- 3 Cups of water
- 1 Tablespoon of powdered spices of your choice, can be turmeric or curry
- 1 Tablespoon of salt
- 3 Tablespoons of oil
- 3 Cups of wheat flour
Steps
Step 1: Sanitize a bench so you can work with the dough after it's ready
Step 2: In a pan, boil the water with the spices, salt and oil. While the water boils, sift the wheat flour and set aside
Step 3: As soon as it boils, turn the heat to low and add all the flour at once, mix non-stop with a spoon trying to break up all the flour lumps
Step 4: As soon as the dough is firm and detaching from the bottom of the pan, transfer it to the countertop, and with the spoon knead it until it is possible to put your hands
Step 5: Form a smooth and homogeneous dough that does not stick to your hands. Then shape the dough into a coxinha
Secrets of Perfect Coxinha Dough
Add Flour All at Once When the liquid mixture boils, turn heat to low and add ALL the flour at once. Vigorously stir with a wooden spoon - this 'shocks' the starch and creates the right dough consistency.
Cook Until Dough Releases from Pan Keep stirring until the dough forms a ball that pulls away from the sides and bottom of the pan. This ensures proper hydration and eliminates raw flour taste.
Cool Before Kneading Let the dough cool slightly before handling. Work with the spoon until you can knead by hand without burning yourself. The dough should be warm but not hot.
Keep Hands Oiled Rub a bit of oil on your hands when shaping coxinhas. This prevents sticking and creates a smooth, professional finish.
Turmeric for Color The turmeric or curry adds that characteristic golden-yellow color of traditional coxinhas. Don't skip it - it's essential for authentic appearance.
Vegan Tips
1: The saffron or curry in the recipe serves to make the coxinha dough yellow
Dough Variations
Customize your coxinha dough:
🍞 **Whole Wheat Coxinha Dough:** Replace half the flour with whole wheat flour (dough will be denser but more nutritious).
🌾 **Gluten-Free Version:** Use a blend of rice flour and tapioca starch with xanthan gum - recipe separate.
🧀 **Cheesy Dough:** Add 1/4 cup nutritional yeast to the flour mixture for subtle cheesy flavor.
🌿 **Herbed Dough:** Add dried oregano, parsley, or chives to the flour for extra flavor.
Frequently Asked Questions
Why is my dough too sticky?
You may have added too much water or didn't cook the dough long enough. The dough should be cooked until it pulls away from the pan. If still sticky, cook 1-2 minutes longer.
Why is my dough too dry/crumbly?
This usually happens when the liquid mixture didn't boil before adding flour, or if you overcooked the dough. Next time, ensure liquid is at a full rolling boil before adding flour.
Can I freeze coxinha dough?
Yes! Shape the dough into balls (without filling), freeze on a baking sheet, then transfer to freezer bag. Thaw in refrigerator before shaping and filling.
How to make this gluten-free?
Traditional wheat flour-based dough is difficult to make gluten-free. Use a dedicated gluten-free coxinha dough recipe with rice flour, tapioca starch, and xanthan gum.
Nutrition Information (per 1/8 of recipe - dough only)
Calories: 220 kcal | Protein: 5g | Carbs: 38g | Fat: 6g | Fiber: 2g (dough nutrition only - filling adds additional calories, protein, and nutrients)

